.JPG) |
| Hammered paint with appliance epoxy over. Doesn't look like plastic -- more like enameled cast iron. |
So I have set out to rectify the appearance of the bike by eliminating as much chrome as possible and getting rid of the purple. The great thing about the VSTAR 650 Classic is how much of the bike is steel rather than plastic.
Those big sculpted front and rear fenders are made of metal and so I can sand it down to the metal and start from scratch. That said, the bike does have some cheap plastic bits on it and I don't like plastic.
At one point I removed the decals and painted the side covers with Rustoleum Hammered metal to get rid of that too-smooth plastic look. It worked great, but now I want the side covers to be black. I could strip off the old paint, but again, I don't want it to look like plastic when I'm done.
So I tried painting over the hammered with Rustoleum Appliance Epoxy - a paint intended for painting refrigerators but used successfully by motorcycle folks to get that powdercoat look without the cost. I used it on the smooth plastic speedometer binnacle and very very happy with it. I wasn't sure how it would look over the hammered paint finish. Turns out, it looks pretty good -- if enameled cast iron is what you like. Beats plastic. I'm also using the same combo of Hammered with Appliance Epoxy over to make the cheap looking plastic covering the neck frame look less horrible. It is not a look for everyone, but I like it.
You can also see I'm playing around with some graphic ideas for the El Burro - I like the type above, but I think I'll try to mimic the sweep of the side covers somehow. Early days yet.
Another part of the bike I wanted to change was the rear tail lights -- It is kind of a droopy mustache looking thing that broke when we were getting the bike out of the truck. I've repaired it but always kinda hated it - it was rusty and funky looking. Over time, however, I've started liking it. It is very distinctive of the V-Star model line, and I've found it a neat way to identify other Vstars the road or in pictures.
The rusty chrome had to go, however, so I sprayed it with Plasti-dip. It actually doesn't look that bad -- the plastic stuff hiding the imperfections and even the electrical tape holding the left side up.
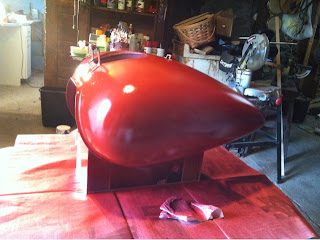
Meanwhile, the rest of the paint is coming together. I really like the Regal Red as it the layers get thicker. The earliest parts have already had clea rcoat and I started sanding with 1000 grit and polishing with the Mequiars Ultimate last night. (as demonstrated by this guy) It looks great -- amazing for rattle can spray paint. Can't wait to see the tank and fenders with this finish.
.jpg)


