Friday, May 20, 2011

Vintage Honda Decals and a Deal!

So I mentioned earlier that I got these great decals from Lord Moon Pie. He has tons of high quality decal work for restoration as well as custom decal for your car/boat or bike.

If you order off his website direct and mention The Retread or my name you'll get a 10 percent discount! Check it out!


Link: Lord Moon Pie http://www.moonpie.co.uk

Sunday, May 15, 2011

Sping Ride Around the Valley

Amy and I got out the other day for a ride around the valley. The sun was perfect, the bike was running good and Amy wanted to try out her new jacket and boots. She's very stylish, even if she had her helmet on too high at first. The bike sounds better and is more responsive with the new pipes too.


Posted by Picasa

Saturday, April 16, 2011

Lights, Filters, Decals

Okay, so I got the first layers of paint on and things looked good. This week I installed a new UNI air filter and worked on the electrical system. There were more wires than I knew what to do with, but after trial and error and pouring over the wiring diagrams, I figured it out. And Lo! There was light ... including the park light.

The downside is that all those connectors don't fit inside the headlight bucket. Problem, having all those electrical connections exposed to the elements is asking for trouble. Moreover, it looks like a hillbilly's front yard.

I found the solution in my shop manual. The Rebel 450s addressed this problem with a junction box behind the headlight because the Rebels cruiser-style headlight was too small. I found a couple of junction boxes on ebay pretty cheap and so I've got one on the way. We'll see how it works.

Another eBay find were these cool vintage Honda stickers made by a seller in the UK. Very cool, they were the hold double transfer type so I only had one shot to get them in the right place, but they ended up looking VERY slick. I was thinking they would get lost in that dark blue but the contrast actually makes them stand out more. Clear coat layers are being applied as I write this. I can't wait to get things all put together and get riding.

Meanwhile the rain continues.

Hey Look, It's lights up! It's alive!

Here's the rough assembly a few days ago during a "sun break"
The front fairing looks good, wind screen my need some adjustment
 - the holes don't match up.

Wednesday, April 13, 2011

Paint On

Once I got the paint off, it was time to bondo the tank and the side case. I'm not sure what happened to this bike before I bought it, but evidence is pointing to a rough life. There are signs that it went down at least once on the right side. That would explain the dent, and the missing stock exhaust and damaged side cover. Anyway, it was my first experience with bondo and it came out pretty good. Won't win any awards or fool anyone, but that's not why I'm doing this anyway.


Then it was time to prime -- prime time! I used a filler-etcher from Dulpi-color that worked really well. I was surprised how great both side covers looked under the prime. It failed to fill in all the little nicks, but I want to have a little evidence that this is a used work-horse motorcycle. Overall it looks really slick.

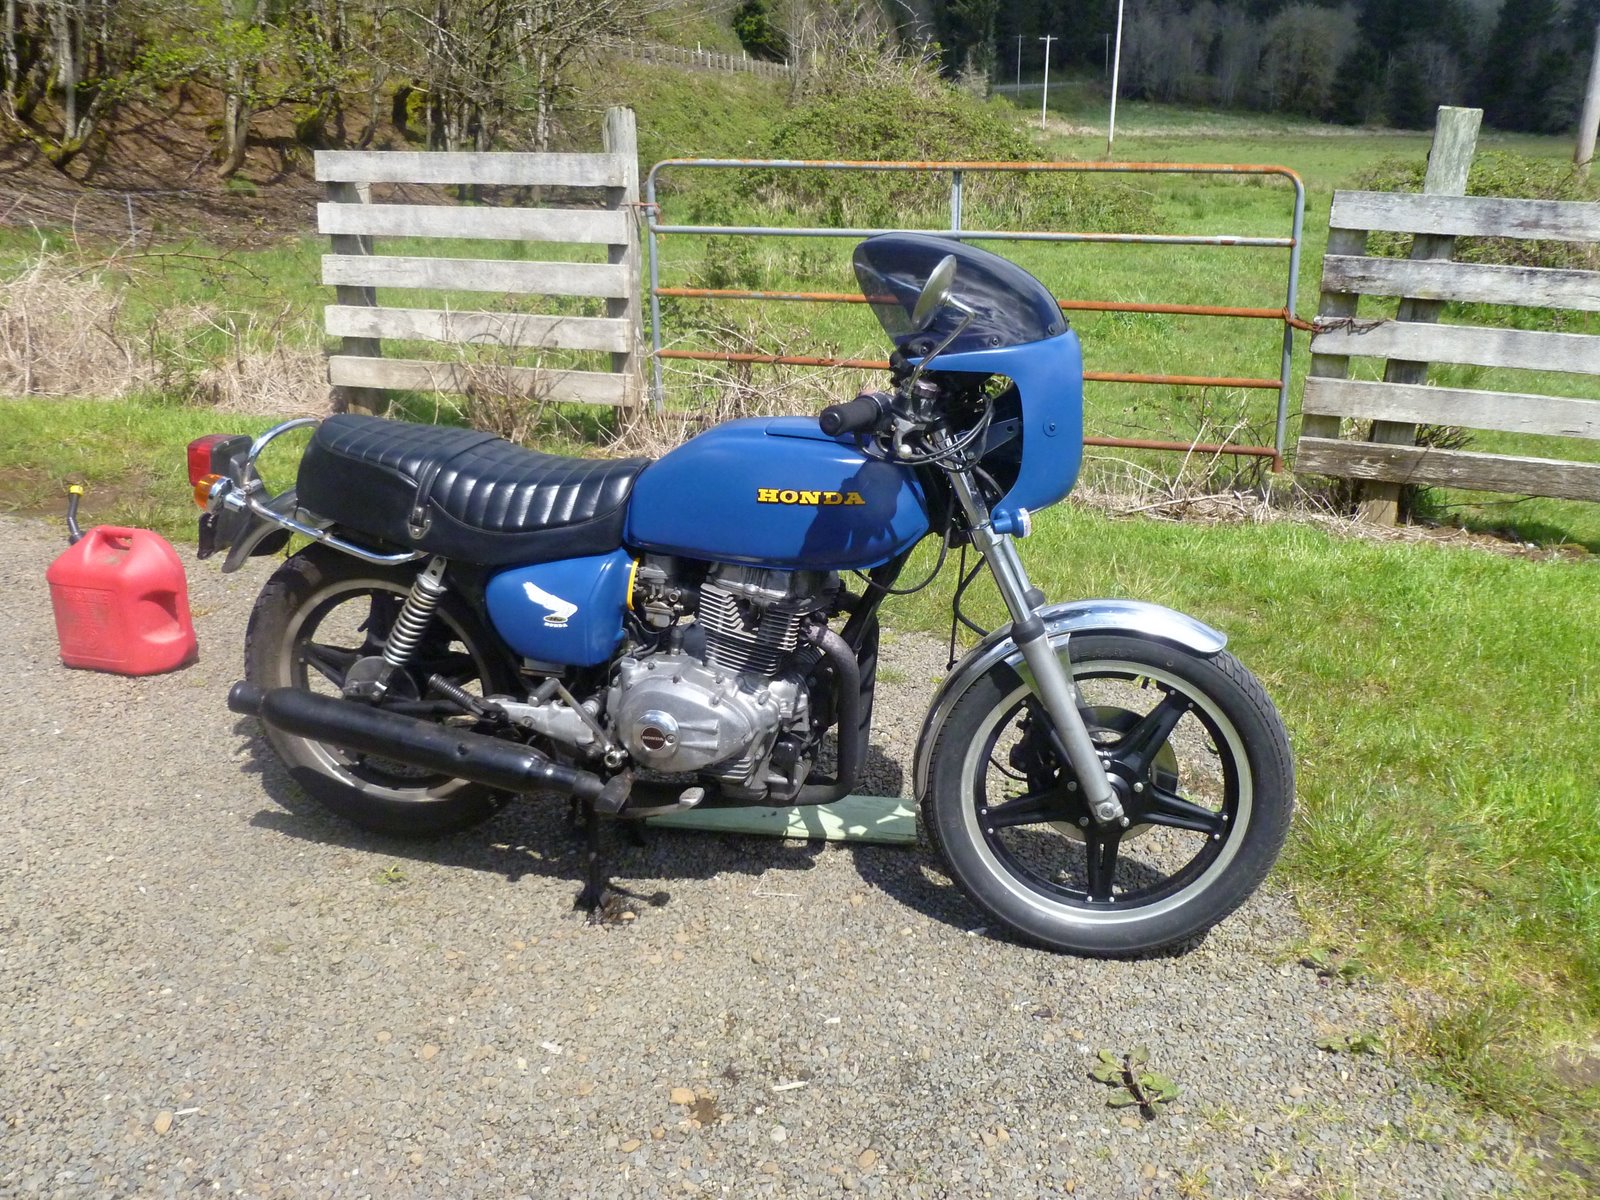
Once the it was primed, it was time to paint. I jumped right in and spent most of a week off laying on coats of  "Dark Ford Blue" Duplicolor Ceramic Engine Enamel. It is very blue ... but a kind of blue that's different from most bikes out there. I like it. It does look similar to Yamaha blue, but oh well.
I used Engine Enamel so it would be tough and resist the oil and grease and such. It gives it kind of a tractor like finish. I'm going to hold off on the clear coat until I get everything dialed in just the way I want it.

Meanwhile, I'm still struggling with the electrics. Bought some super cheap turn signals from Asia on ebay that work great. They were an ugly carbon-fiber faux finish which I quickly painted over. Guess what, they accidentally sent me two pairs! Also bought a new battery -- sealed cell. It's working great and is about half the size and weight as the old one.

I did a final outdoor assembly just to see if I liked where this was going. It looked pretty darn good. I realized however, that the windscreen I bought doesn't exactly match up with the fairing ... which means I'm going to have to drill some holes. I also found that the school bus yellow trim paint I bought is better in small doses. I had the headlight bucket yellow and side covers, but reverted both to blue. Looks much better now.

Here's some additional progress photos:

Drag bars went on. The drag bars improve the bike's profile, making it look a little less dorky. We'll see how they feel on the road.

Monday, March 7, 2011

Paint On, Pain Off

So the headlight looks so good on the front of the bike, I'm contemplating leaving the faring off and going old school. That said, even if I sell the faring, I need to get the rust off and fix the mounting hardware. So off it came with a little BoltOff. Then I soaked it in CLR for a day and the rust dissolved away. painted with a couple coats of engine enamel and it looks as good as, used.

I also started stripping the gas tank with Citristrip. We've used this non-toxic chemical stripping gel all over our house and it works great, cleans up good and it is doing an amazing job on the tank. The trick is patience. Put a coat on and walk away until the next day -- it will be all bubbled up. We scrape it off and wipe off the scraper in a shopping back held over our other hand like a glove. Works like a charm. The tank is about 80 percent done already. Extra coats are needed, but not a lot of elbow grease. The tank cover, I dry sanded down and covered with two coats of duplicolor primer and one coat of engine enamel in black. This will be a contrast color, still not sure what the final color will be.

Pipes are covered in stove black after some CLR rust removal. The power chamber -- which was completely rust covered got the same treatment and all looks good. Got it all done, just before the bad weather moved in. Will get pictures soon, I promise!

Thursday, March 3, 2011

She likes it electric

Okay, so I've got the headlight on and most of the nest of wires fits in the headlight bucket, so it really cleans up pretty good. It is a really tight fit, and I have some wires that don't have a home yet, but I've successfully got the headlight and turn signals connected.

That said, two things are apparent:

1) The heavy turn signals have no place to go. They will fit on the headlight bucket, and they look kind of cool, but the stalks they came with ~barely~ fit. I've ordered a lightweight cheapo set from Hong Kong that I can attach to the faring directly. This will also solve another problem I have. I'm eliminating the chrome from this thing, since much of it is pitted and rusted. I'll cover all the chrome parts in a gloss black engine enamel. However, the retro turn signals are just too pretty to paint over. The cheapos will paint just fine and blend in instead of standing out.

2) Things aren't blinking. When I relocated my rear turn signals to the back of the bike, they wouldn't blink. Not sure if they did before, but I know they worked before teardown. So now the question is what has to be connected to get them working. When I hooked up the front turn signals, they lit up just right, but did not blink. So either I have a blinker unit that is shorted out, or all the connections need to be made to get it blinking. I'm not going to over pursue it at this point. My battery will need to be replaced for the new season and it may just be that I'm short of power to work the blinkers.

Meanwhile, the motorcycle is looking pretty good. I tried the faring out with the new bars and headlight and it's is going to look like a cool old BMW going down the road. Much work left to do however, and summer is coming.